
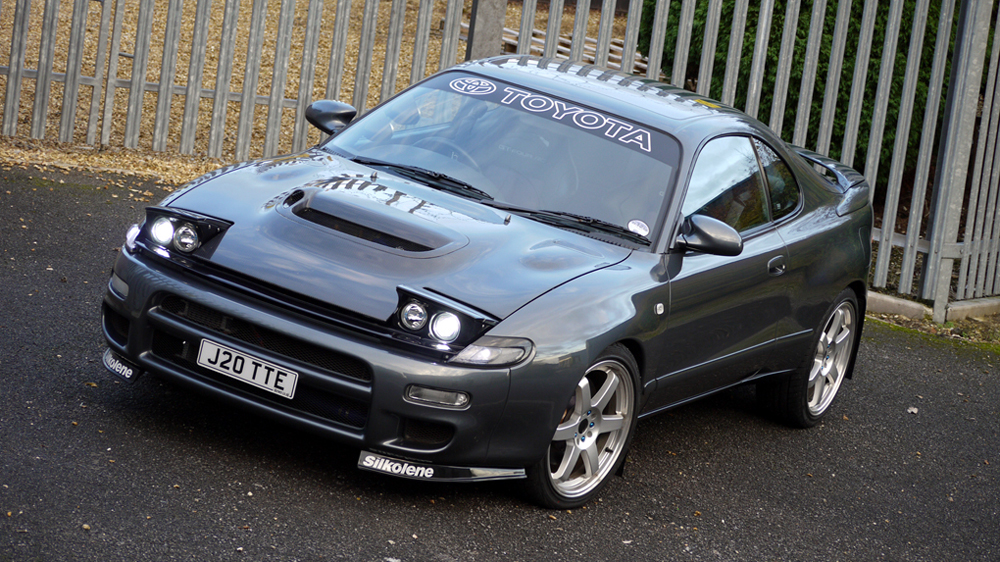
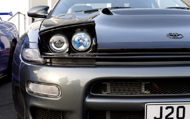
Turbo Upgrade
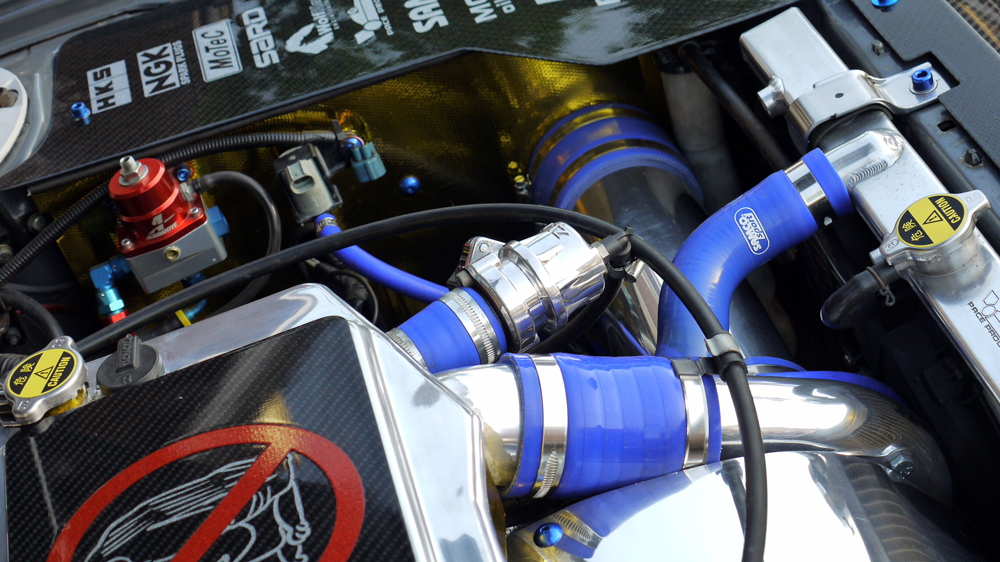
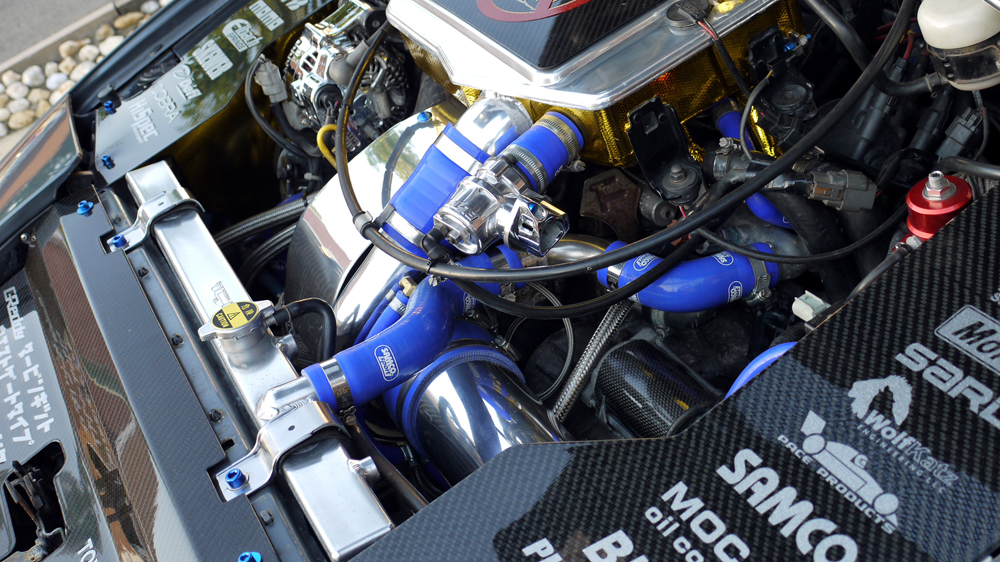
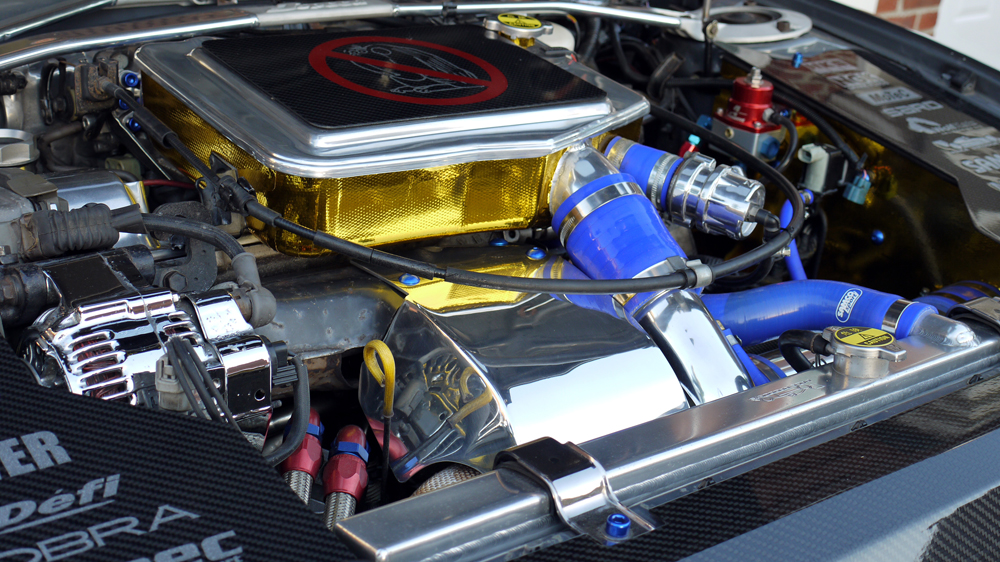
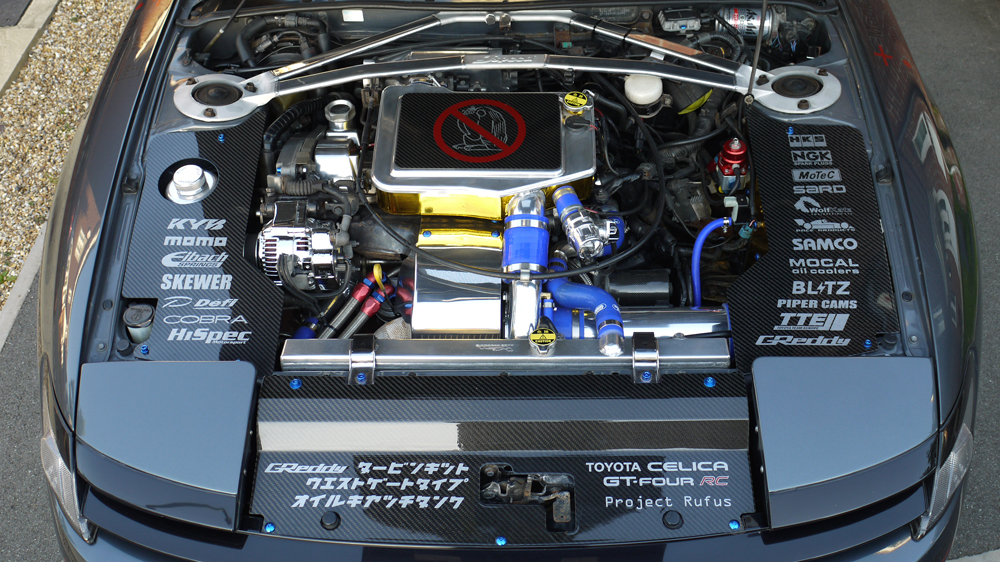
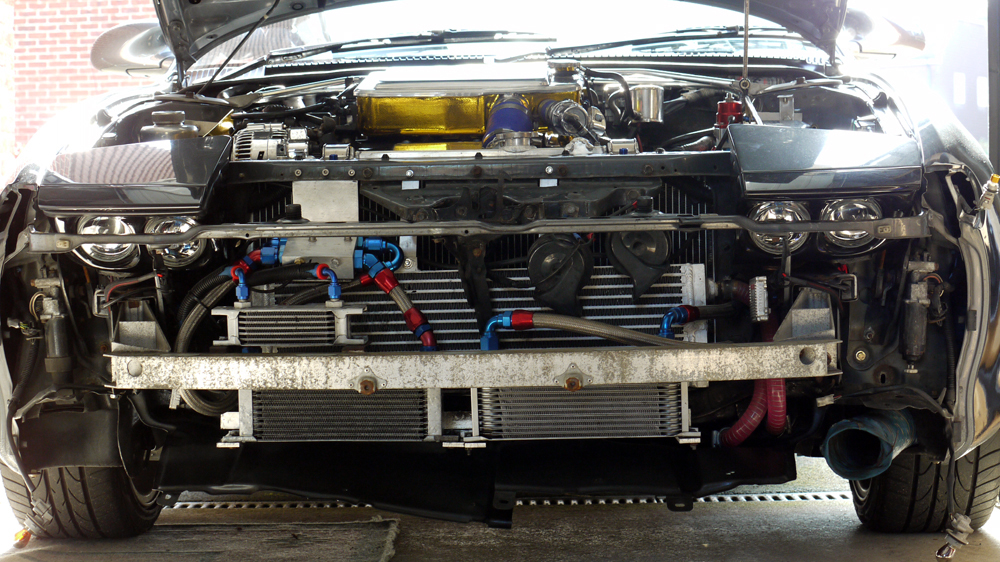
The GT3071R upgrade also gave other opportunities to make improvements. To this end I also upgraded to the beefier ST205 charge cooler, updated the cold air box design now that we had a 4 inch straight intake, and a new polished turbo heatshield was made up. We got the compressor housing of the turbo polished also, would be rude not to, and made use of the charge cooler's BOV fitting to add a nice shiny Blitz Super Blow Off Valve. Things were starting to look good.
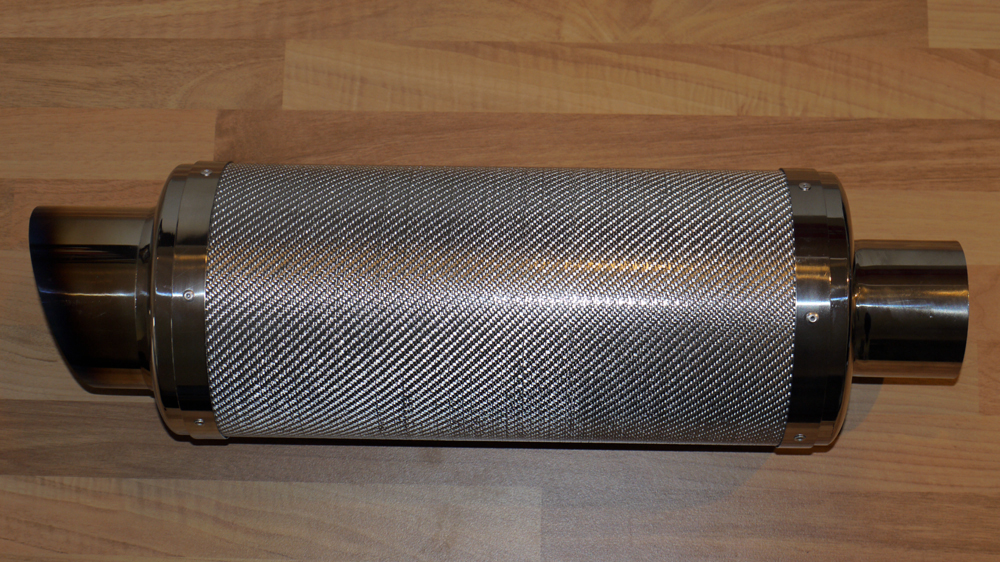
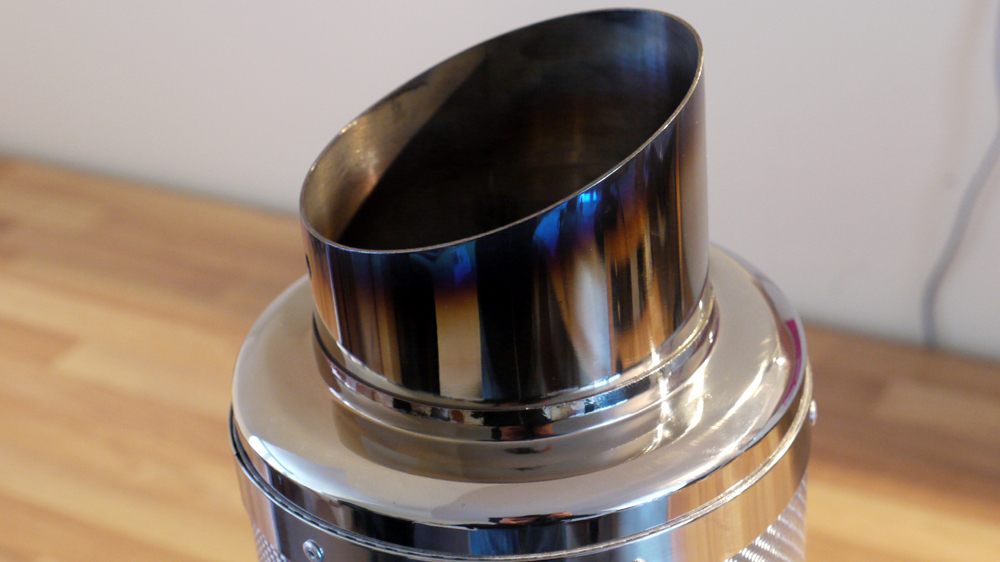
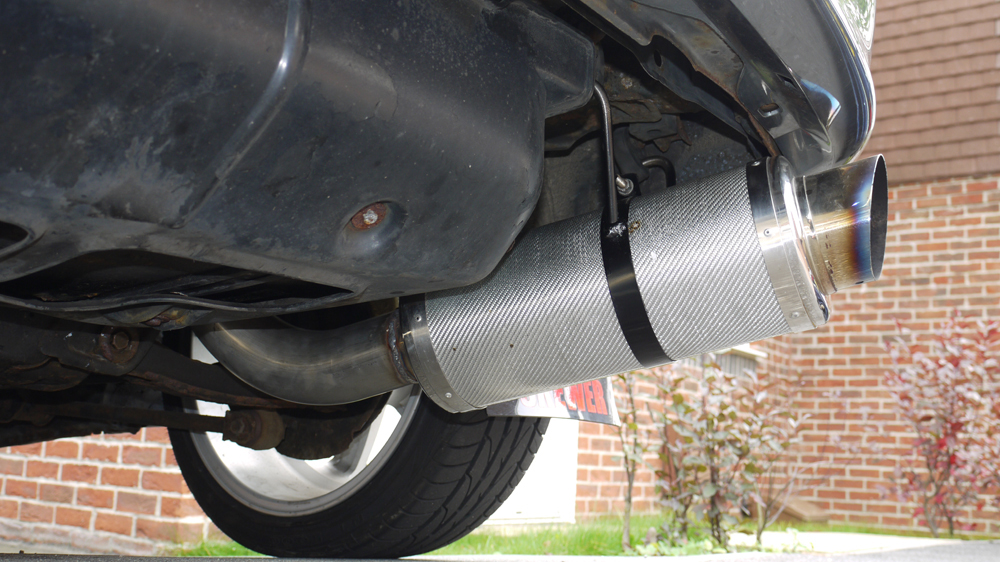
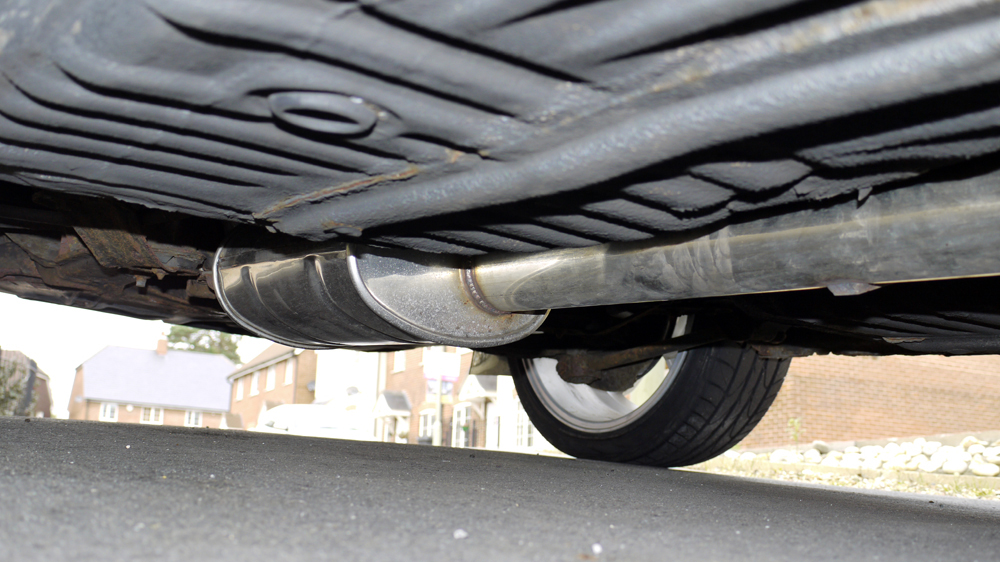
The addition of a full three inch stainless exhaust would round off the turbo performance, We also fitted a mid section silencer to reduce the volume a little. I had to inlist the help of a CCUK member with connections in the US to buy and send over the rear muffler for me as the supplier over their wouldn't ship outside the States. It was a trial to find a silver carbon fibre can with four inch slash cut burnt titanium tip and three inch inlet, so it had to be done.
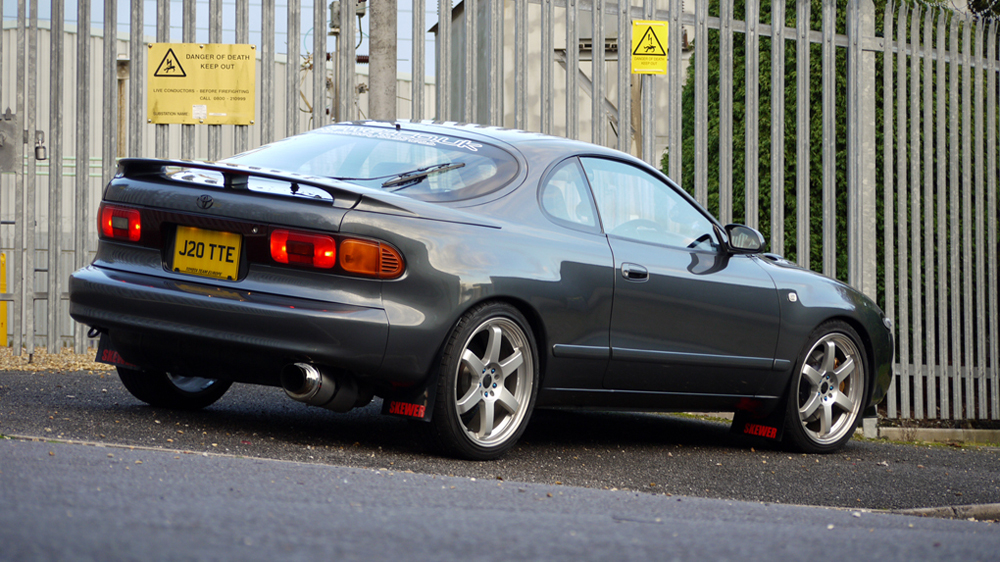
More Restoration
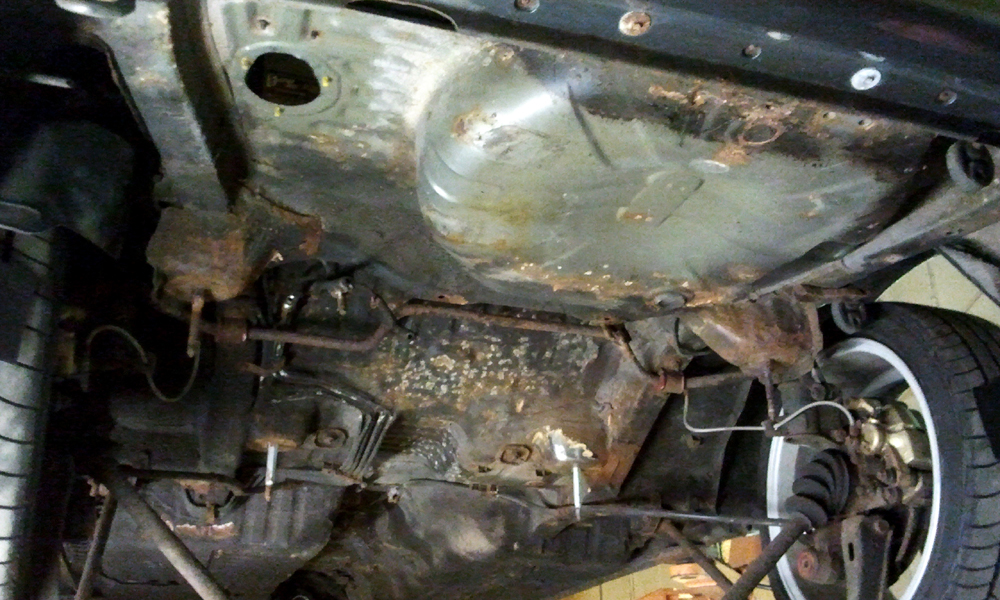
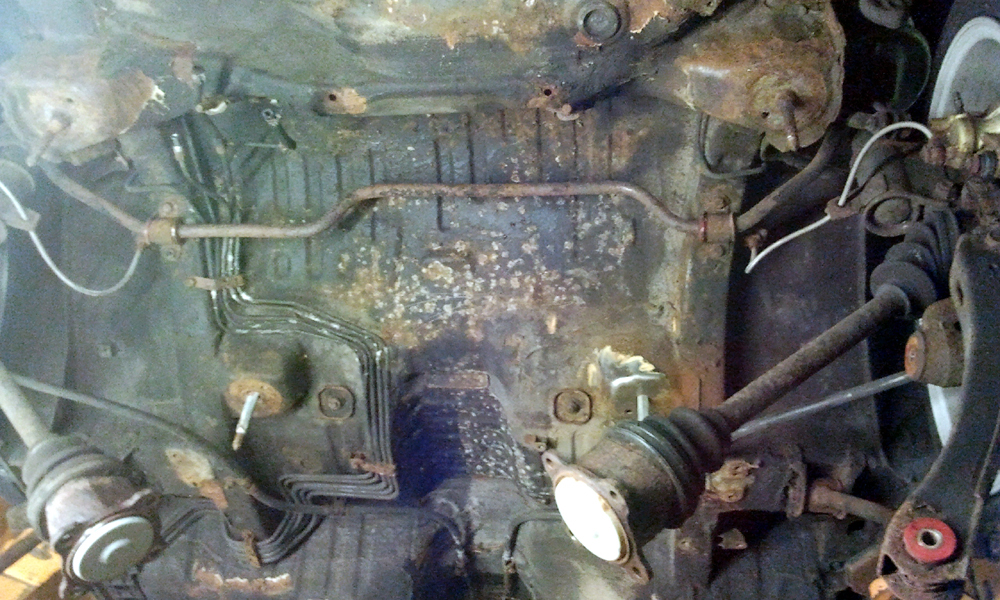
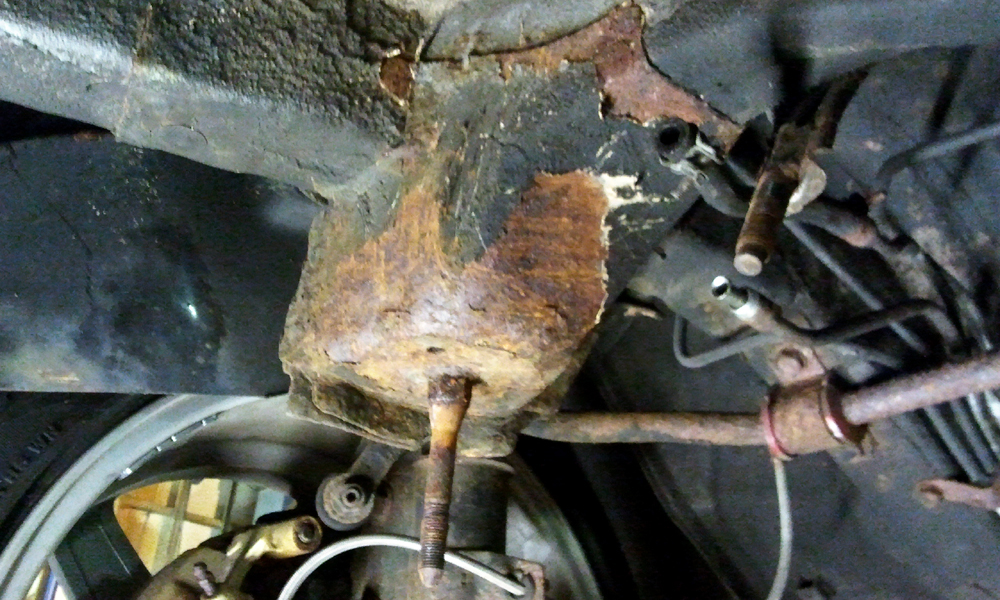
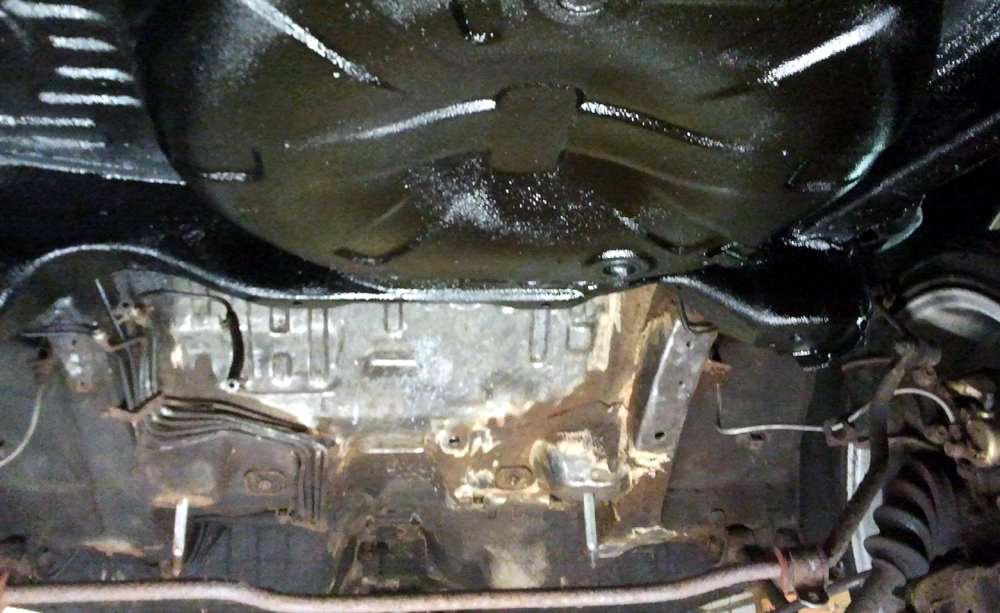
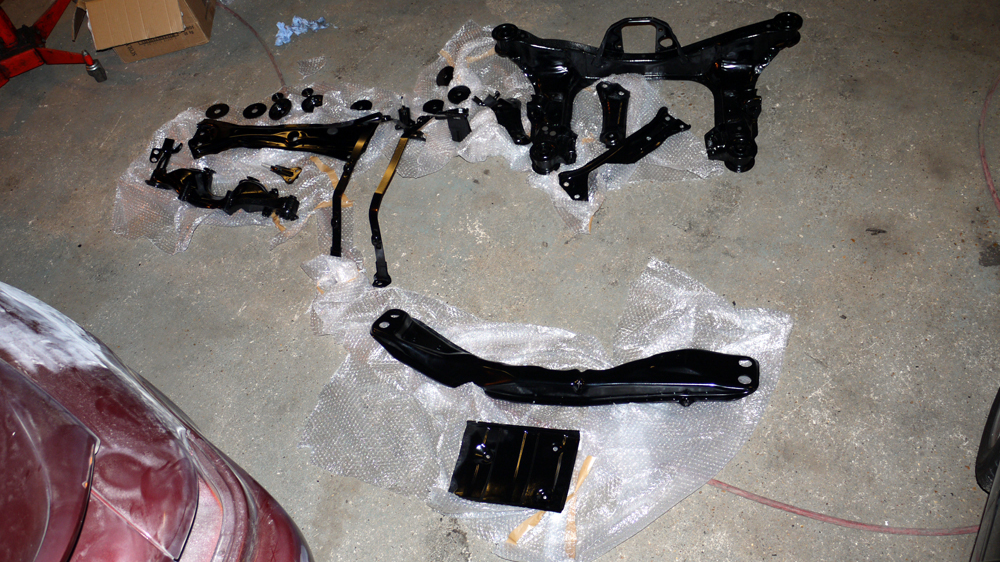
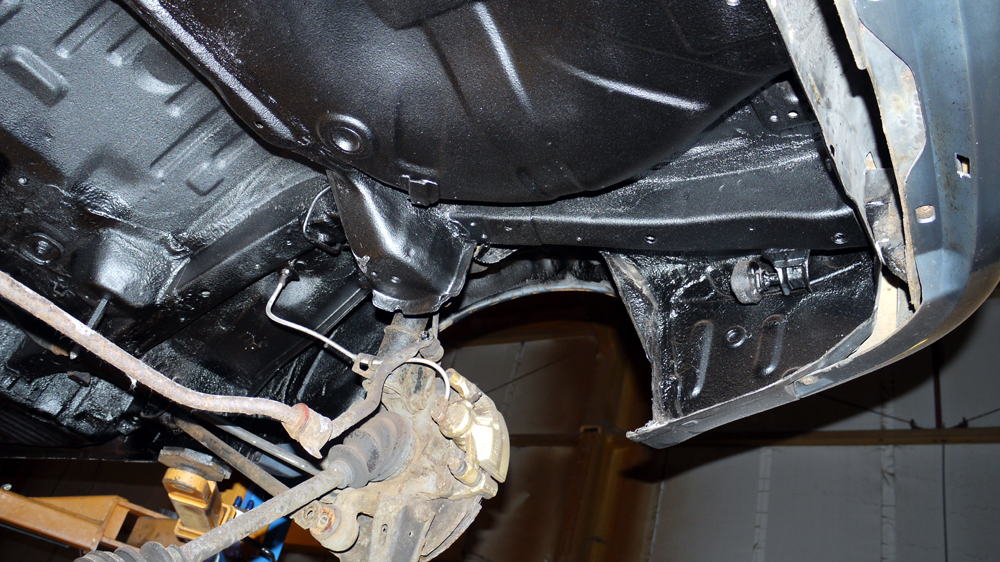
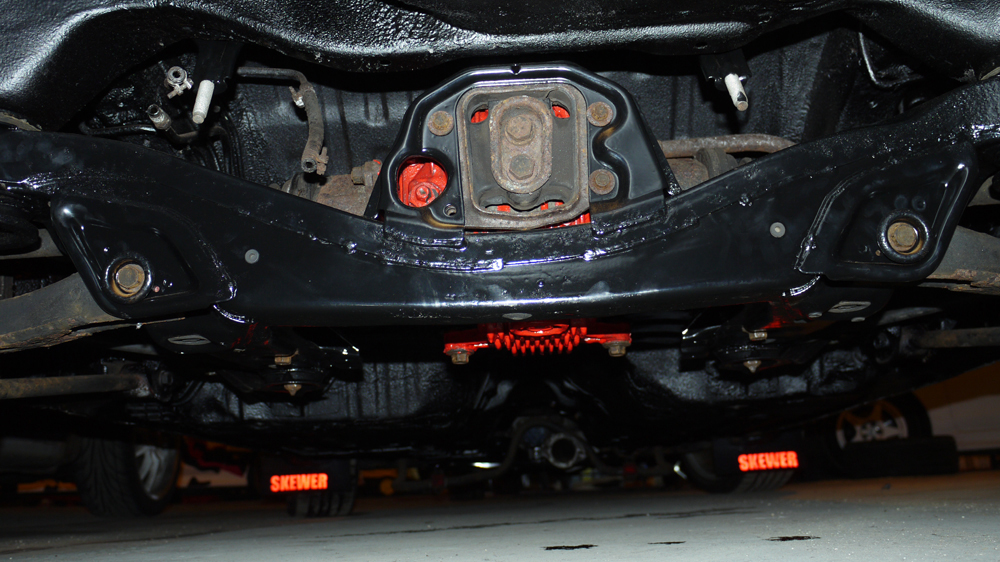
It was now getting on for 10 years since first buying the car, and the original under body work was showing it's age. Some spots of rust were starting to appear, the fuel tank smelt a touch leaky and given all the effort to get the top side looking perfect the decision was made to completely overhaul the underneath. This would comprise of a new fuel tank, various sundry parts cleaned up and powder coated, bushes replaced, remedial welding sorted and the whole underside taking back to bare metal to clean up, treat, and seal for the duration. It was an epic amount of work for the guys at JDModified and they did a great job getting it back to tip top condition.

Improved cooling and boot build
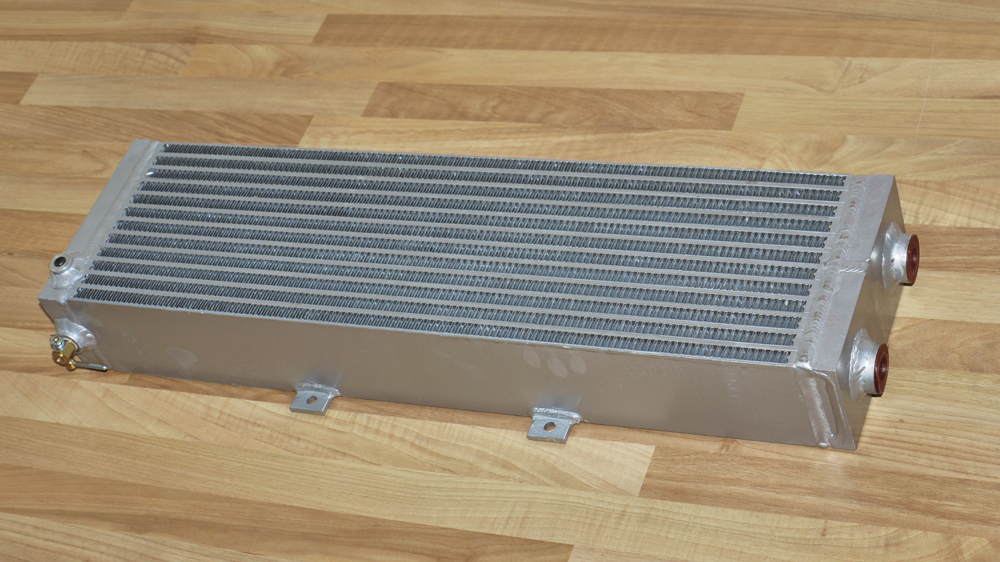
One thing that can sometimes be overlooked is cooling, so we made sure everything there was covered. First up, a large 3" core pre-rad was ordered from the US for the charge cooler, it would improve cooling efficiency and increase overall volume of the system, making the most of the larger ST205 charge cooler. The oil filter had already been moved thanks to a Fensport relocaton kit, but we added in a Mocal cooler with thermostat plate. The previously removed gearbox oil cooler was reinstated in the form of another Mocal cooler, and the power steering cooling element, which looked utter gash, was replaced with a mini Mocal oil cooler. That took care of all the temps under the bonnet.
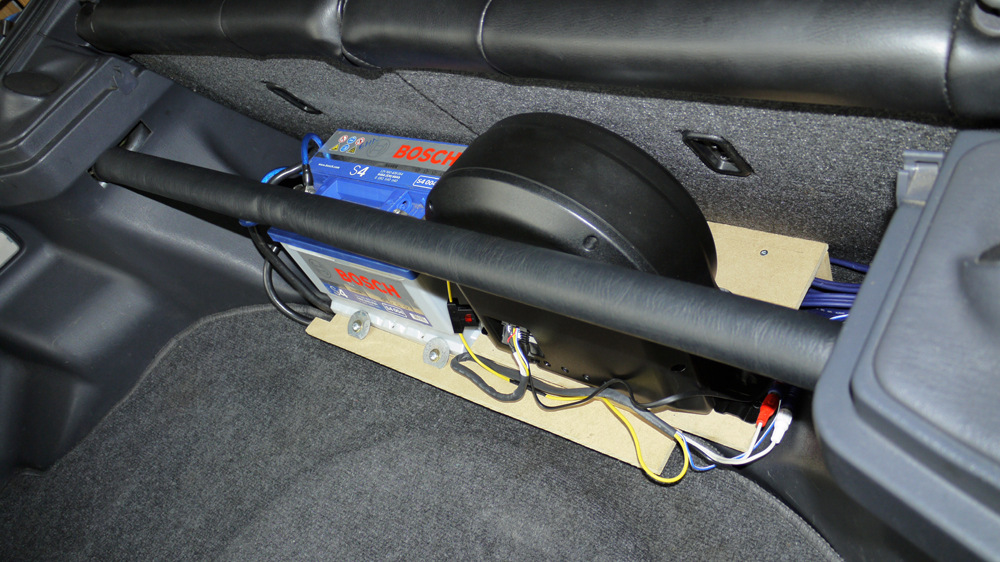
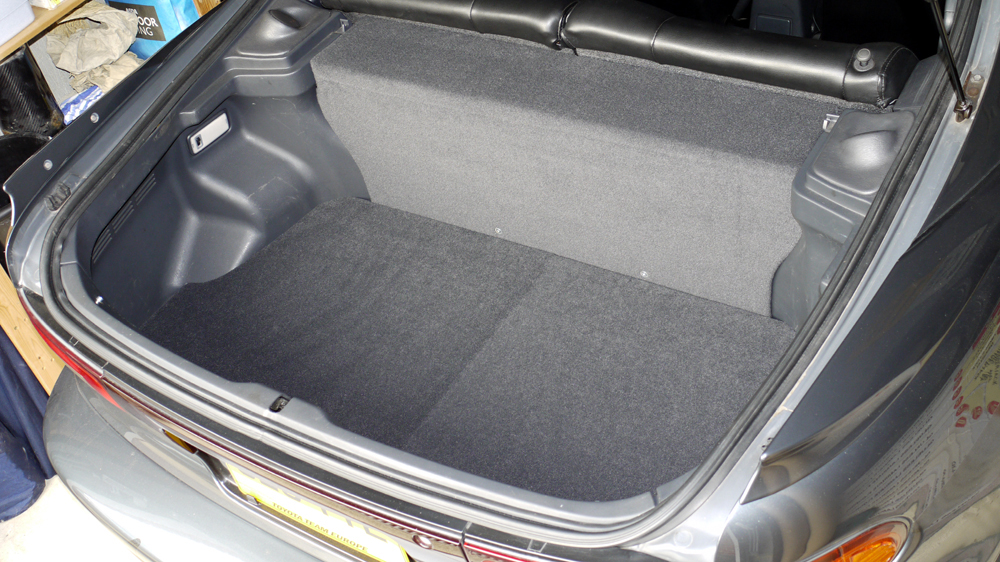
The original battery in the boot conversion had never looked pretty, an ugly red box bolted to the floor wasting space. So I decided to build a small platform behind the rear seats for it. Not only would it look neater it would distribute the weight better by not having it hanging over the back of the rear wheels. There was also space for a slim Pioneer active sub, which is just enough to round out the frequency of the stereo install, without being too boomy. Over that I made an MDF cover and a new floor to greatly improve usable space, albeit at the expense of a spare wheel. Leaves some room for tools under the floor though if needed.
Mapping and realisation
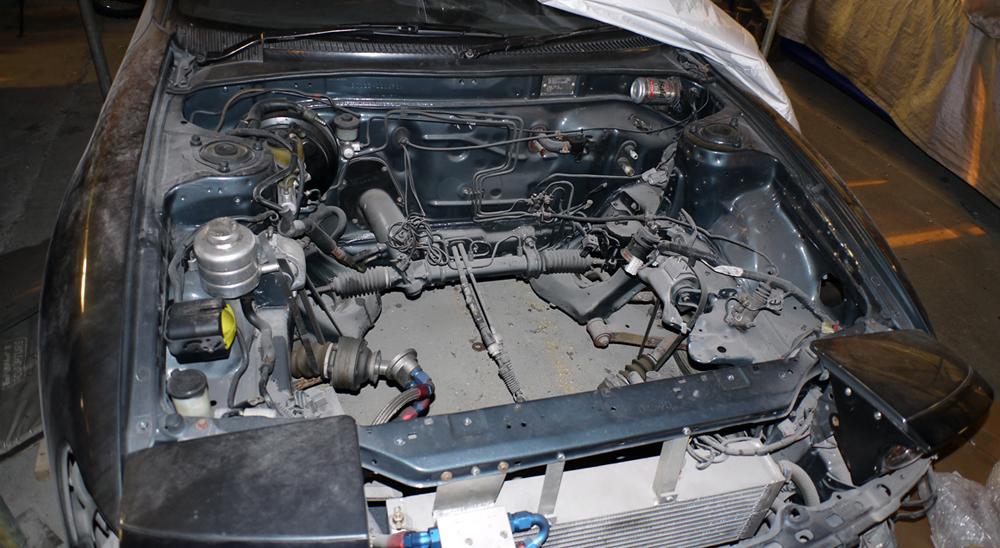
Following the turbo upgrade and cooling improvements it was time to give the Motec a tweak and see what sort of power we could get. We were seeing figures of around 300 bhp 250 lb/ft of torque, but the turbo still wasn't performing as well at it should. We also spotted the tell tale signs of the engine starting to suffer, smoke indicating oil getting passed the piston rings when on full boost. It was the original block, and although not massive mileage it was getting a bit long in the tooth. After some deliberation it was decided that the best bet was to sort an engine build. Better to do it now while everything is pretty much still in one piece. Forged pistons and rods would be the way forward and we would also look more into turbo options, though a rather restrictive and convoluted path for the recirc wastegate might also be causing some of the problem with control of the turbo.
So, in the winter of 2012 Rufus came off the road for the engine build. It was never planned to take four and a half years, but personal circumstances dictated the pace. However, some research and lucky finds in the early months changed the proposed plan for the build, which was going from something that would have been perfectly good, to something which turned out to be rather better...
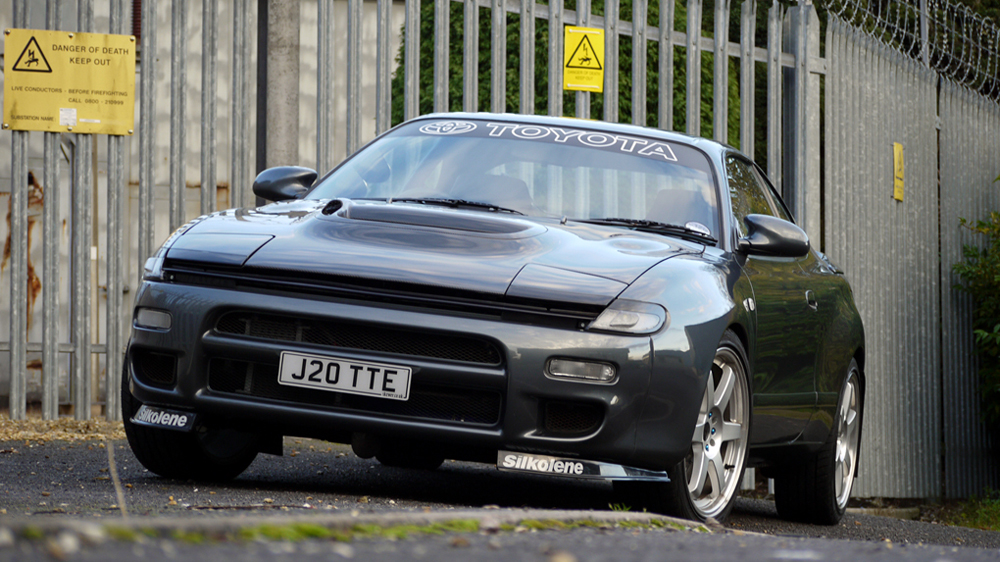
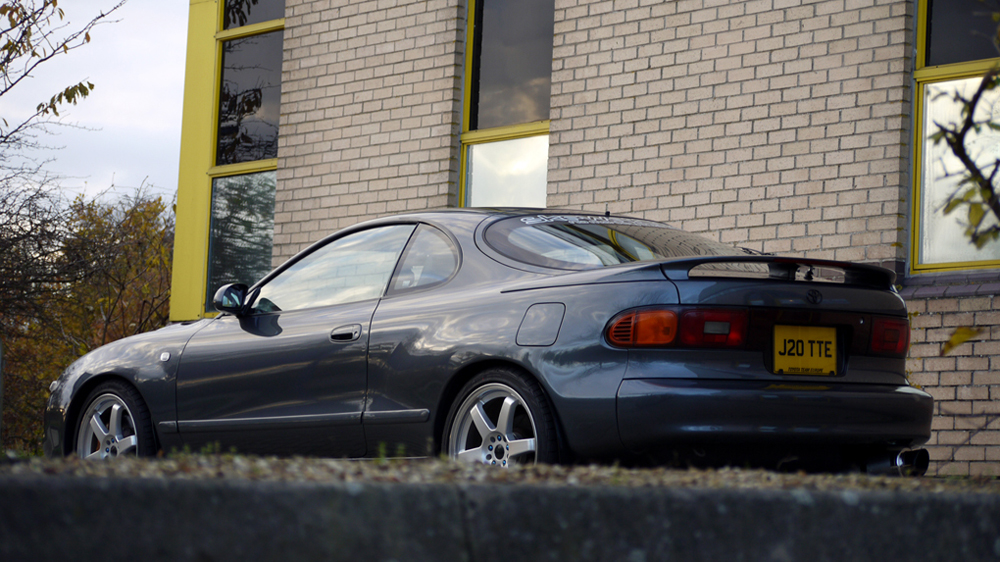
Before coming off the road I removed the graphics, I'd be going for a new look once the engine was done, something a little less subtle than it's been up until now. I had also acquired a carbon bonnet which got a test fit, though I decided against this in the end, the front lip wasn't quite right. So, this was one last photo opportunity while he was 'naked' of graphics
Revised plans
So, having sorted the interior, the paintwork, underbody, wheels, brakes, lights, etc. etc. it was now time to tackle the last big upgrade - the engine. I had previously looked into options for a 2.2 but costs were somewhat prohibitive, and folks were generally doing it for big power, 500+ bhp, which was never my goal. I'm all after midrange torque and a sweet drive on the road.
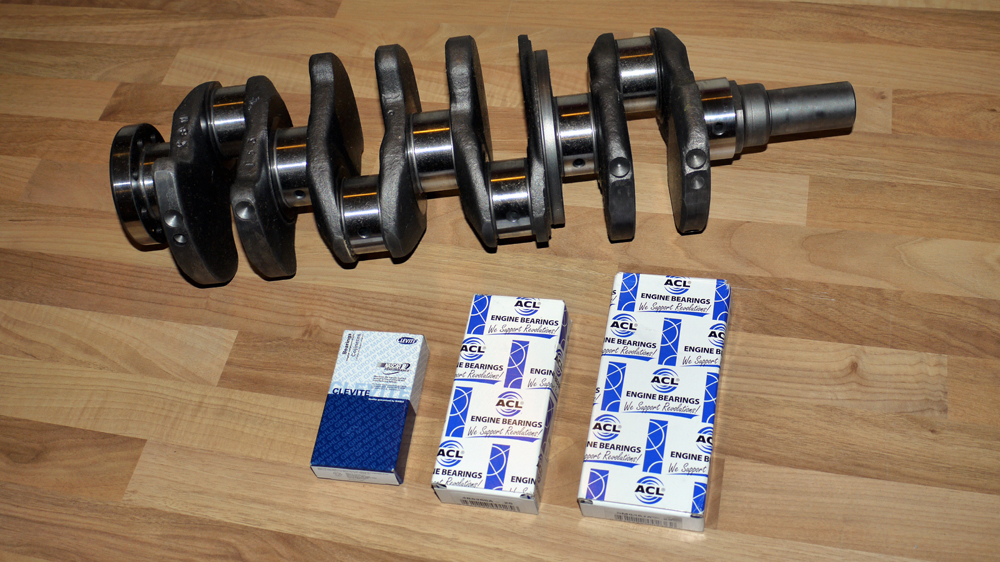
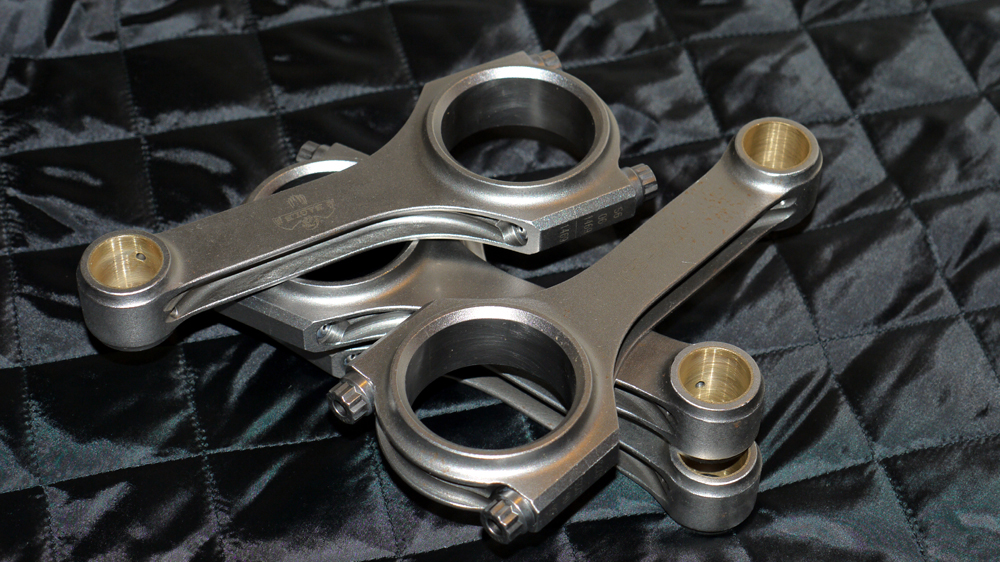
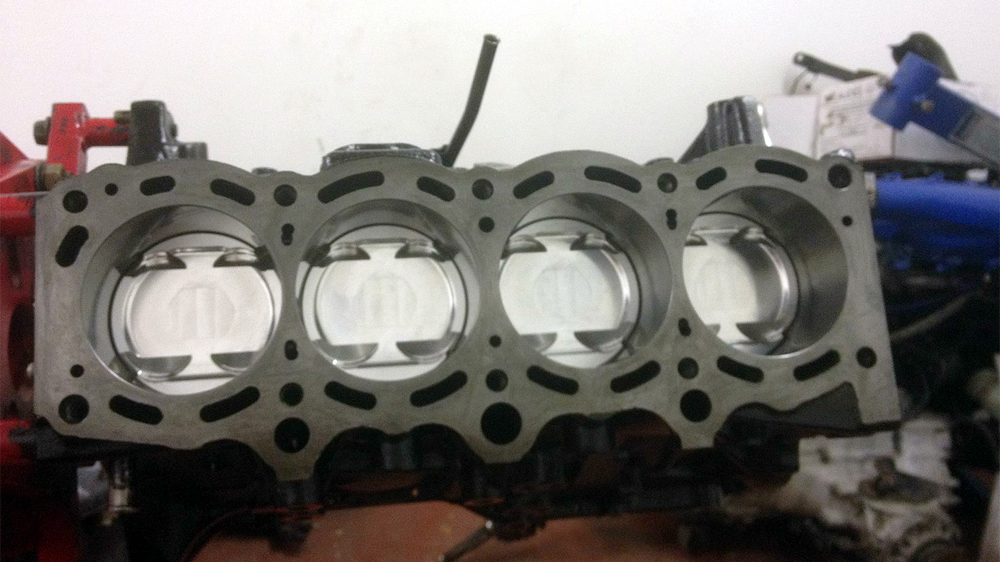
However, luck shone my way and I happened across a new 3S block on ebay which already had HKS 2.2 stroker specific liners fitted which I managed to pick up for under  400. At the same time, I found a place in the US that sold the 5S crank, which worked out at less than 150 delivered. I couldn't pass up the opportunity so snapped them up. A third piece of good luck saw me amass some new 3S Eagle rods for very little off a GT4OC member and things started to come together. I then sat down with James and we discussed all my requirements and came up with a spec to get the build spot on for me. It came down to this - custom forged CP pistons, available specifically for the 3S block, 5S crank, 3S rods combo set at 9:1 comp ratio; 1mm oversized intake valves for the head to match the oversized exhaust valves; swap out the 264 cams for stock ST205 ones, keep the GT3071R turbo as it will effectively be 10% smaller with the larger engine and should thus spool quicker, and totally rebuild the downpipe making the wastegate pipework much more efficient. The aim of all this would be to bring the engine and its peripherals all back into balance, with a little more off boost performance, albeit at the expense of top end power, and gain as much midrange torque as we can.
Rebirth
The engine build was coming together, so it was time to think of a few finishing touches. I'd already had the alloys refurbed and finished in a different colour and was contemplating some other details under the bonnet, as well as a few small upgrades to the interior to give it a little more class. The story will be fully up to date shortly...
Exposed
On Show at JAE 2010
Always enjoy getting Rufus to the shows, whether it be with the CCUK, any number of GT-Four clubs, or the HJC, always a good crack. Such appearences should be increasing in the near future.
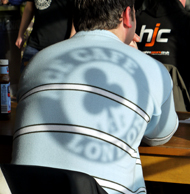
Ace Cafe
Flying the Flag
Heading to the Ace Cafe with Hampshire Jap Cars in 2013. Nothing quite like showing off Rufus at one of the most iconic automotive travel cafes in the UK. Enjoyed a bacon sandwich and spotted the pefect shadow...
Rewarding
Building the Collection

Rufus earning some awards with the CCUK in his early years, including Best Gen 5, Best Go, and Best Graphics. With more work to come this collection will hopefully grow. Thanks again to everyone who voted for Rufus, much appreciated.
Asahi
Super Dry
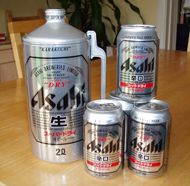
Asahi Super Dry is a nice crisp beer, and proper JDM! So what better way to celebrate than have it adorn the car. A small can on the wiper motor cover is the first appearence, but every other can in this pic will also be in there in due course. Page three will reveal all, how's that for a cliff hanger?